What is it about cherry blossoms that makes them one of the most requested subjects in drawing classes? Part of the answer is the balance between simplicity and refinement. A cherry blossom drawing involves only five petals per flower, yet the way those petals overlap, the way light passes through them, and the way clusters build along a branch give the subject almost endless visual interest. If you are looking for flower drawing ideas that reward careful observation, few subjects deliver as consistently as sakura.
A sakura flower drawing teaches you to see negative space as clearly as positive form, which is a skill that transfers to every other subject you draw. Drawings of cherry blossoms also require you to manage repetition thoughtfully, since a branch carries dozens of flowers and you need each one to read clearly without making the whole thing look mechanical. A cherry blossom tree pencil drawing takes that challenge even further, balancing the dark architecture of the branch against the softness of the blossoms.
Flower Drawing Ideas: Why Cherry Blossoms Work So Well
Petal Simplicity and Elegance
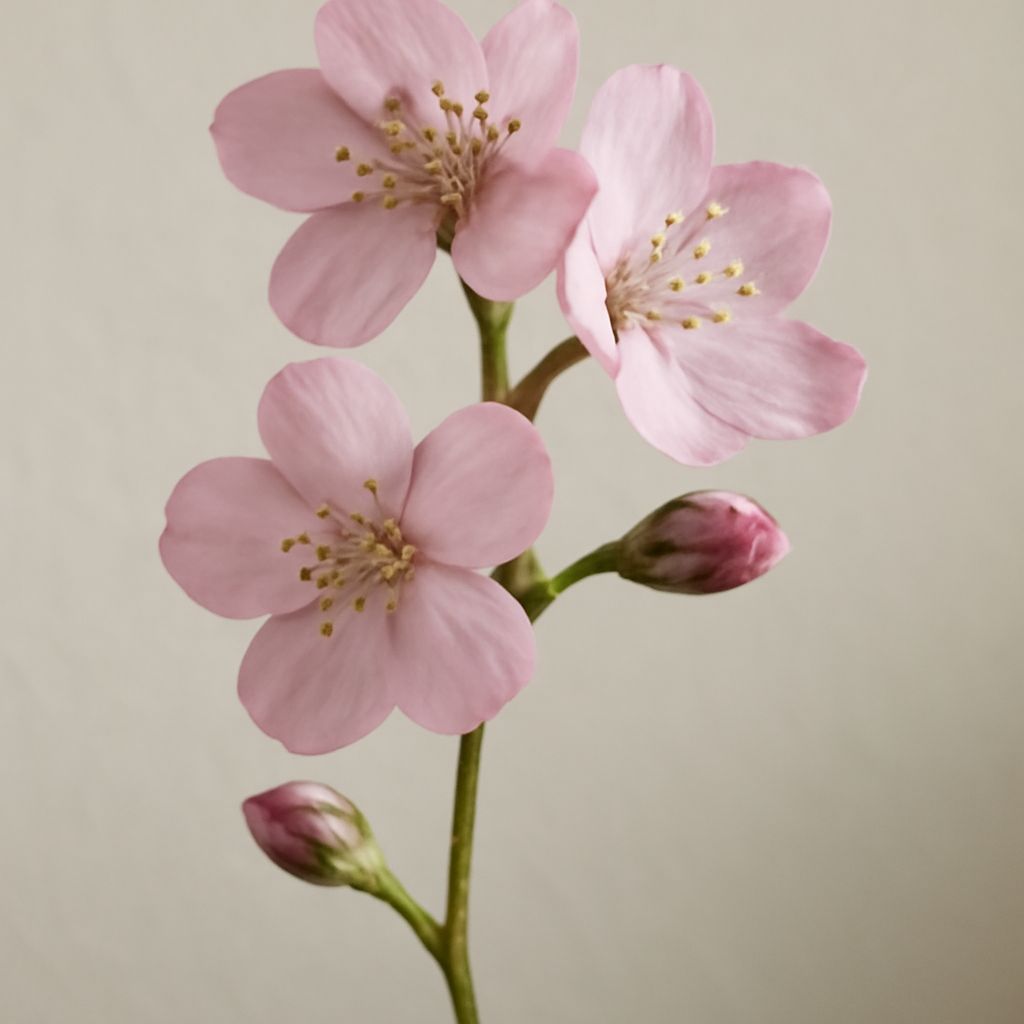
Each cherry blossom has five rounded petals with a small notch at the tip. The shape is simple enough to draw quickly but distinctive enough that a viewer recognizes it immediately. This combination makes cherry blossoms ideal flower drawing ideas for artists who want to practice repetitive forms without losing their minds drawing complex petals over and over.
Negative Space as a Tool
The gaps between petal clusters are as important as the petals themselves. In a well-composed cherry blossom drawing, the sky or background shows through the clusters in irregular patches that balance the density of the blossoms. If you fill in every gap, the drawing loses its airy quality and starts to look heavy.
Sketching the Sakura Flower
Five-Petal Structure
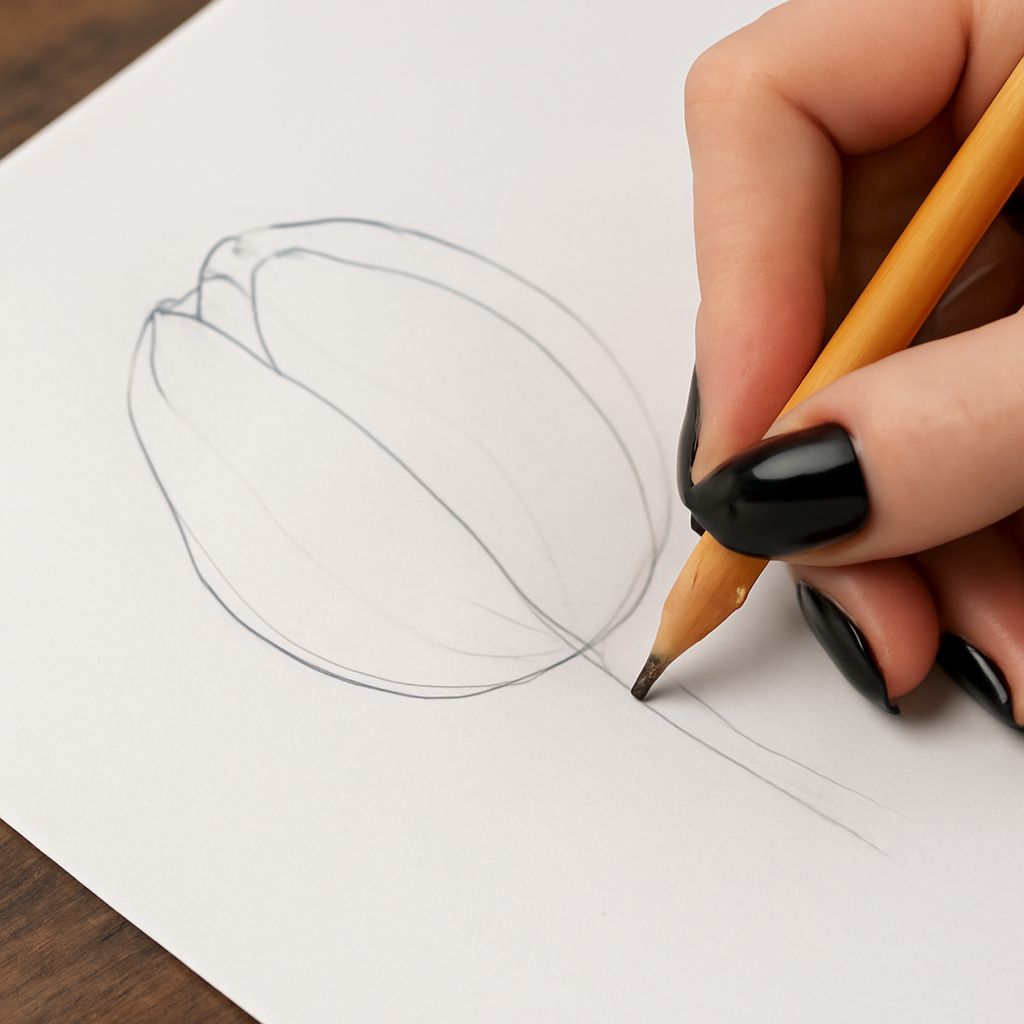
Start each flower with a small circle for the center and five ovals radiating outward at even intervals. Soften the ovals into more organic rounded shapes and add the characteristic notch at each petal tip. This notch is the detail that separates a sakura flower drawing from a generic flower, so do not skip it. Keep lines light at this stage.
Stamen and Pistil Details
Cherry blossoms have prominent stamens that extend beyond the petal level and give each flower a delicate, lacy quality. Rendering six to ten short, fine lines from the center of the flower, each ending in a tiny dot, adds authenticity to your sakura sketch. You do not need to draw all of them perfectly; a suggestion of the cluster reads correctly.
Bud and Open Bloom Variations
A branch in full bloom has flowers at various stages: tight buds, half-open cups, and fully open blossoms. Including all three stages makes drawings of cherry blossoms more natural and visually interesting than rows of identical open flowers. Buds are small, rounded, and often slightly pink-tipped at the seam where the petals will separate.
Cherry Blossom Tree Pencil Drawing
Sketching the Branch
The branch is the structural backbone of a cherry blossom tree pencil drawing. Use a dark, slightly rough line that tapers as it moves away from the trunk. Branches fork at irregular intervals. Resist the urge to make branches perfectly symmetrical; real trees fork at different angles and distances from one another, and that irregularity is part of what makes a tree drawing convincing.
Adding Clusters of Blossoms
Cherry blossoms grow in clusters of three to five flowers on short stems called pedicels. Group your flowers in these natural clusters rather than spacing them evenly along the branch. Some clusters will be dense and overlapping; others will be more open. Vary the density deliberately to avoid a pattern that looks planted rather than grown.
Bark Texture Techniques
Cherry tree bark has a distinctive horizontal lenticel pattern, appearing as short horizontal marks across the smooth surface. A few well-placed marks suggest this texture without requiring you to cover the entire branch in detail. Keep the bark rendering lighter than the darkest shadows in your blossom clusters so the flowers remain the visual focus.
Inking and Shading Drawings of Cherry Blossoms
Line Weight for Petals
Use a lighter, finer line for petals and a heavier, more confident line for the branch. This contrast in line weight does much of the work of differentiating soft from hard in your cherry blossom drawing. A brush pen is particularly good at producing this range because you can vary pressure to get both fine petal outlines and bold branch lines from the same tool.
Hatching for Depth
Light parallel hatching in the shadow areas of petals suggests their three-dimensional form without heavy tonal work. Petals that face away from the light source get slightly denser hatching than those facing toward it. Because petals are translucent, the shading is gentle and never reaches very dark values.
Using White Space
Leave the brightest areas of petals completely untouched. In drawings of cherry blossoms, white paper reads as direct light on pale petals more effectively than any amount of careful erasing would achieve. This is especially true in ink work where you cannot remove marks once they are placed.
Next Steps for Your Cherry Blossom Practice
Once you are comfortable with single flowers and small branches, try moving your cherry blossom drawing practice into watercolor. The pale pink and white palette of sakura suits watercolor’s translucency naturally, and a loose wet-on-wet wash creates soft petal edges that pencil cannot replicate. For building a full composition, try framing a branch against a simple gradient sky rather than a white page. The contrast gives your cherry blossom tree pencil drawing a stronger sense of atmosphere and place.