Are you struggling with head anatomy drawing, or perhaps you just want to refine your skills in creating lifelike head sketches? Whether you are a beginner or an experienced artist, understanding the intricacies of head anatomy is essential. In this tutorial, we dive deep into the art of drawing the head, covering everything from basic anatomy to mastering tilted head drawing. You will discover techniques that can elevate your artistry and transform your understanding of this fundamental aspect of drawing.
Head sketches can be challenging, especially when tackling different angles and perspectives. But don’t worry; this guide provides a step-by-step approach to help you conquer these challenges. By the end of this tutorial, you’ll possess enhanced skills for creating both straightforward and dynamic head drawings.
Understanding the Basics of Head Anatomy Drawing
Key Components of Head Anatomy
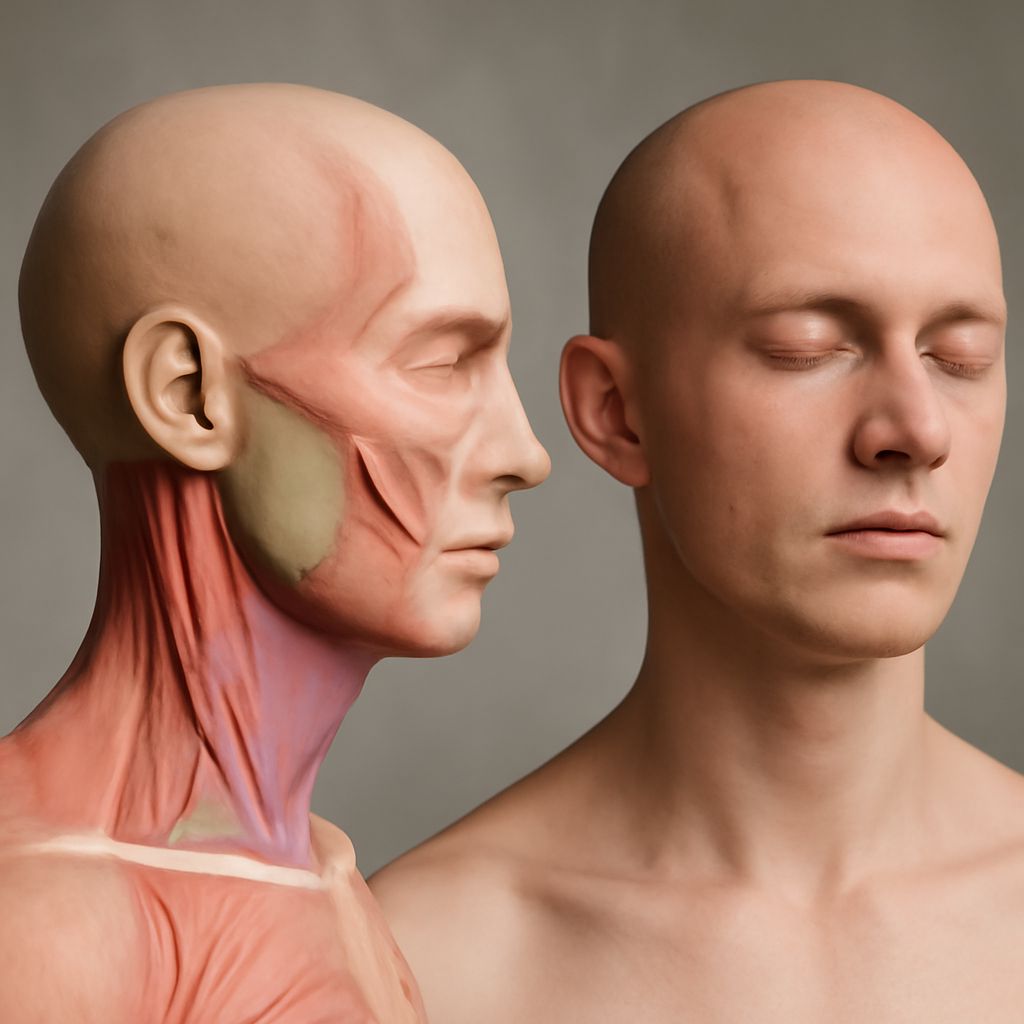
To begin with head anatomy drawing, you need to familiarize yourself with the basic structure of the human head. The head is composed of the skull, mandible, and facial features such as eyes, nose, and mouth. Recognizing the proportions and spatial relationships among these elements is crucial for creating realistic head sketches.
Artists often start with a simple sketch of the skull as it provides the foundation for adding details like muscles and skin. The skull, with its unique shape and form, influences the overall appearance of the head. When doing head anatomy drawing, always keep in mind the placement of the jaw, cheekbones, and forehead. These serve as guideposts in your sketches.
Common Mistakes in Head Anatomy Drawing
Avoiding common mistakes is key in mastering head anatomy drawing. One frequent error is neglecting the correct proportions, which can lead to distorted features. Ensure that you are consistently measuring and comparing parts of the head against each other.
Another pitfall is ignoring the three-dimensional form of the head. Many artists fall into the trap of drawing flat, two-dimensional heads. To counter this, practice visualizing the head as a solid object with depth and volume.
Step-by-Step Head Drawing Tutorial
Tools and Materials for Head Sketches
Before you dive into drawing, gather the necessary tools and materials. For effective head sketches, you will need quality pencils, an eraser, and sketch paper. Some artists also find it helpful to use a ruler or compass for ensuring accurate proportions.
Consider experimenting with different types of pencils to achieve various textures and shades in your head sketches. The right tools can significantly impact the quality and precision of your drawings.
Simple Techniques for Drawing a Head
Start your head sketches by outlining the general shape of the head. A common approach is to draw an oval and use guidelines to position the facial features accurately. These guidelines are essential in ensuring symmetry and balance.
Once the basic shape is in place, gradually build up the details. Focus on capturing the unique characteristics of each facial feature. Pay attention to the way light and shadow interact on the head, as this can add depth and realism to your drawings.
Mastering Head Sketches with Different Angles
Approaches to Tilted Head Drawing
Tackling tilted head drawing can seem daunting, but with practice, it becomes manageable. Start by understanding how the head’s structure changes with different angles. Use reference photos or a mirror to observe how tilting affects the appearance of the head.
When working on a tilted head drawing, adjust your guidelines to reflect the new perspective. This means altering the position of the facial features and the angle of the jawline accordingly. These adjustments are vital for maintaining proportion and realism.
Practicing with Various Head Positions
To become proficient in head sketches, practice drawing heads from multiple angles and positions. This includes profiles, three-quarter views, and extreme angles. Each position presents unique challenges but also offers opportunities to explore different aspects of head anatomy.
Use a sketchbook to experiment with these various angles. Over time, you will develop a more comprehensive understanding of how to capture the head’s form and expression in diverse positions.
Next steps: Continue refining your head anatomy drawing by regularly practicing and seeking feedback. Consistent practice and experimentation with different styles and techniques will significantly enhance your drawing skills. Remember, the key to improvement is persistence and a willingness to learn.