Sea Turtle Drawing: How to Sketch and Paint Turtles with Confidence
Why do so many artists find sea turtles such rewarding subjects? The shell’s geometric pattern, the sweep of the flippers, and the ancient quality of the face combine into a subject that works in nearly any medium. A sea turtle drawing challenges you to observe carefully while also leaving room for expressive interpretation. Whether you want a realistic turtle drawing for a nature journal or a loose painted study, the process starts with understanding the animal’s actual structure.
Realistic turtle drawing does not mean photographic accuracy. It means capturing the proportions and key details that make a sea turtle instantly recognizable. Sea turtles drawings range from tight pencil work to fluid watercolor washes, and each approach produces something worthwhile. A watercolor sea turtle, for example, lets the paint do some of the work in suggesting the skin’s texture and the ocean’s light. Even if you are exploring turtle font and lettering design, understanding the turtle’s silhouette gives your letterforms authenticity.
Understanding Sea Turtle Anatomy for Drawing
Shell Patterns and Geometry
The sea turtle shell has a central row of large scutes called vertebrals running down the spine, flanked by four rows of costal scutes on each side. Smaller marginal scutes ring the outer edge. This pattern is not random; it follows a predictable geometry that you can map out lightly before committing to ink. Getting this grid right early makes the rest of the sea turtle drawing much easier to develop.
Flipper Shape and Proportion
Front flippers are long and paddle-like, used for propulsion. They attach at a point roughly one-third down from the front edge of the shell. Rear flippers are shorter and more rounded, used primarily for steering. Both pairs taper to a point. Drawing them foreshortened, as they would appear when the turtle swims toward you, adds depth to your composition.
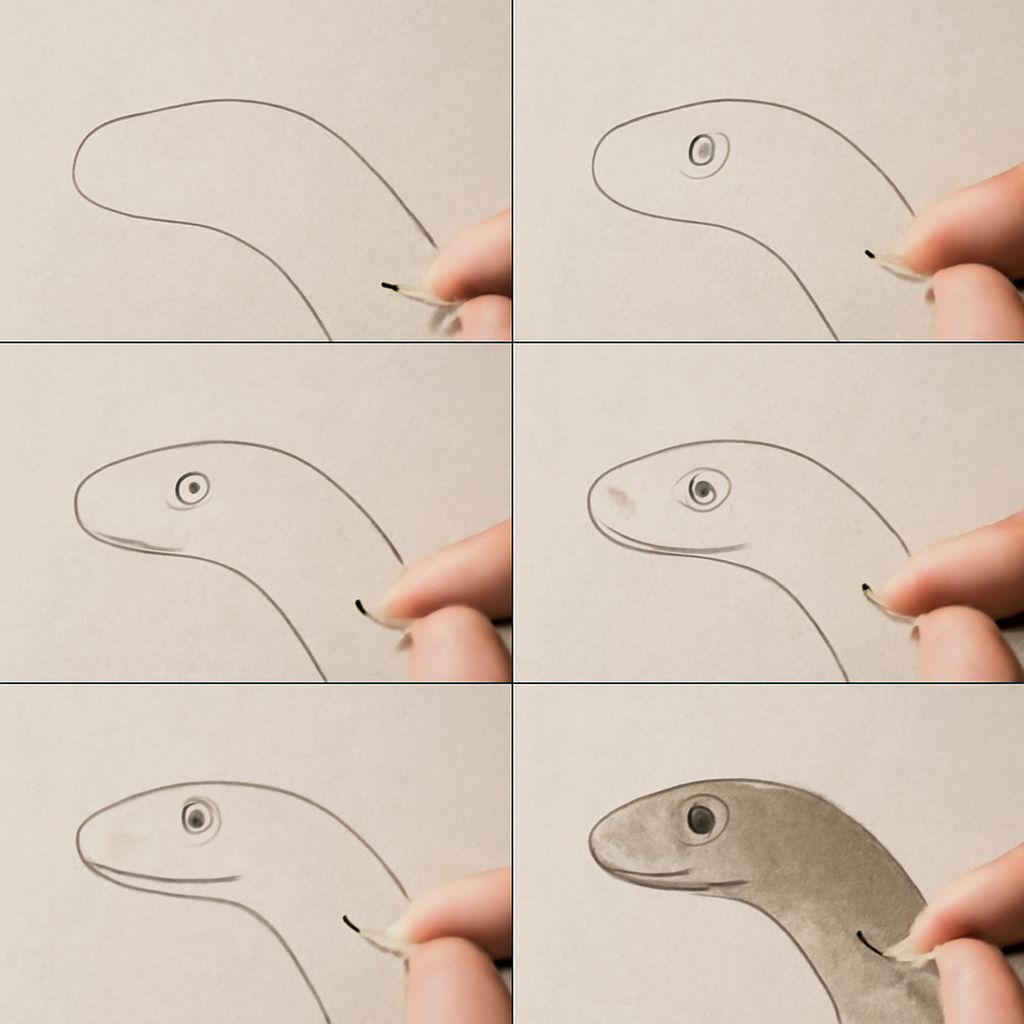
Head and Eye Details
The head is relatively small compared to the shell and sits on a short neck. The eye is large, dark, and somewhat round, with a visible scale pattern on the surrounding skin. That eye detail is often what gives a finished sea turtle drawing its emotional quality. A carefully placed highlight in the eye transforms the drawing from a diagram into a portrait.
How to Create a Realistic Turtle Drawing
Sketching the Basic Form
Start with an oval for the shell and a smaller circle for the head. Place these in relation to each other before drawing any detail. The shell oval should be slightly wider than tall when viewed from above. Once the major shapes are placed, add lines for the four flipper positions.
Adding Shell Details
Use light curved lines to map out the scute pattern. Work from the center vertebrals outward. Keep lines fluid rather than perfectly geometric since real shells have slight irregularities. This irregular quality is part of what makes a realistic turtle drawing feel alive rather than diagrammatic.
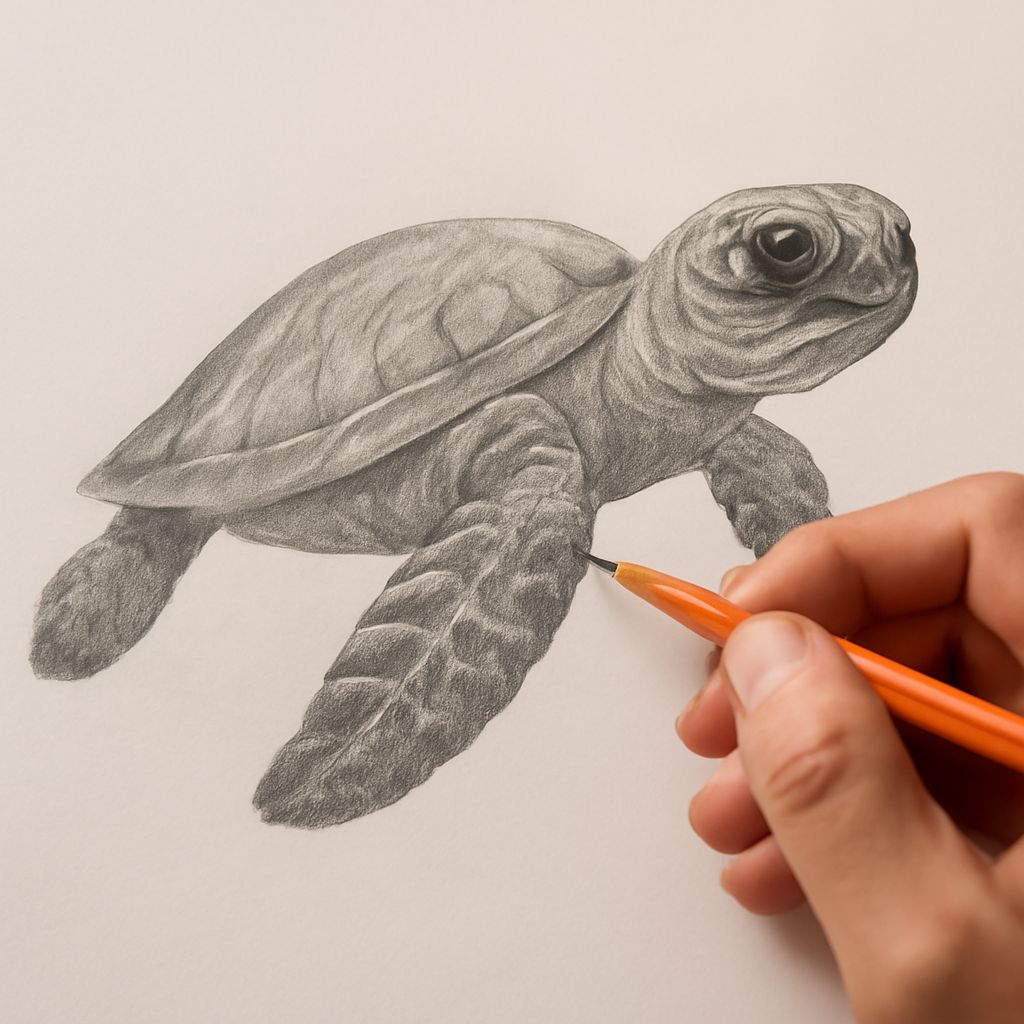
Shading for Depth
Sea turtles are typically darker on top and lighter on the underside. Apply shading along the edges of the shell where it curves away from the viewer. The flippers get darker values near the body and lighter values at the tips. Cross-hatching works well for the shell’s hard surface, while softer blending suits the skin areas.
Watercolor Sea Turtle Techniques
Choosing Your Palette
Real sea turtles range from olive green to brown to black depending on species. For a watercolor sea turtle study, a palette of yellow ochre, sap green, burnt sienna, and ivory black covers the range. You can mix these four colors to achieve most of the values you need without muddying the result.
Wet-on-Wet for the Ocean Background
Wet your paper first and drop in cerulean blue and phthalo blue while it is still damp. Let the colors bloom and merge naturally. When the background dries, paint the turtle on top with more controlled strokes. This contrast between loose background and defined subject is a classic watercolor approach for sea turtles drawings.
Painting the Shell in Layers
Start with the lightest color across the whole shell and let it dry completely. Add a second wash where shadows fall. A third pass of concentrated color in the darkest recesses between scutes completes the illusion of depth. Patient layering is the core skill in watercolor sea turtle work.
Sea Turtles Drawings: Composition Ideas
Single Turtle Close-Up
A close-up view of the head and front flippers, cropped at the shell edge, creates an intimate portrait. You lose the full silhouette but gain the ability to show fine skin texture and eye detail that gives the piece personality. This framing works especially well for sea turtles drawings in a sketchbook format.
Underwater Scene with Multiple Turtles
Showing two or three turtles at different scales and depths creates the illusion of an underwater environment. The largest turtle in the foreground gets the most detail, while the smaller, more distant ones receive only a suggestion of shape. Overlapping the turtles further reinforces the sense of space.
Beyond Illustration: Turtle Font and Lettering
Using Turtle Shapes in Typography
Turtle font design uses the silhouette and shell pattern of sea turtles to inform letter shapes. The hexagonal scute geometry translates naturally into letterforms with angular structure. If you are designing a turtle-themed logo or poster, try tracing the shell grid and adapting its lines into a custom alphabet. Even individual letters built around a turtle shape can read clearly as type when the proportions are right.
Bottom line: Sea turtle drawing rewards patience and observation, whether you work in pencil, ink, or watercolor. Study the shell geometry before adding detail, and let the medium do some of the expressive work. Each sketch you complete builds the observational vocabulary you need for more ambitious pieces.