Drawing Figures: Basic Figure Drawing Steps for Artists at Every Level
What is the most reliable way to start drawing figures with confidence? Build from structure outward rather than from outline inward. Drawing figures that look convincingly three-dimensional requires understanding that the body is a collection of overlapping volumes, not a flat silhouette. Basic figure drawing focuses on getting these volumes right before any surface detail, which is why gestural and structural approaches dominate most serious figure drawing curricula.
Simple figure drawing starts with the same principles regardless of how complex the final piece becomes: proportion, structure, and gesture. Drawing the figure with these three concepts organized in sequence produces better results faster than trying to draw everything at once. Figure drawing step by step is not a rigid formula but a logical ordering of decisions that prevents earlier mistakes from propagating into later stages of the drawing. Drawing the figure in this structured way builds habits that improve all figure work over time.
Proportions in Basic Figure Drawing
Standard Head-Based Proportions
The most widely taught proportional system for drawing figures divides the body into seven and a half to eight head-heights for an idealized adult. In this system, the head occupies the top unit, the chin to the nipple line occupies the second unit, the nipple line to the navel occupies the third, and so on down to the feet at the eighth unit. Simple figure drawing benefits enormously from internalizing this proportional framework because it gives you a quick check for any drawing: count head units and see where the key landmarks fall.
Key Proportional Relationships
Beyond the overall height measurement, several internal proportional relationships matter in basic figure drawing. The arms, when hanging at the sides, reach roughly to mid-thigh. The hand, spread flat, is roughly the same size as the face. The shoulders of an adult male are roughly two and a half head-widths across. The hips of an adult female are typically slightly wider than the shoulders. These relationships are not universal across individuals, but they give you useful default proportions for drawing figures that read as adult human forms.
Gesture: The Foundation of Drawing Figures
What Gesture Means in Figure Drawing
In drawing figures, gesture refers to the overall energy, movement, and attitude of the pose rather than to any specific anatomical element. A figure’s gesture is what you would capture in two seconds with a single sweeping line before any structural detail appears. Finding the gesture first prevents the most common error in figure drawing step by step approaches: producing a stiff, upright figure that looks like it is standing at attention regardless of what the reference pose shows.
The Line of Action
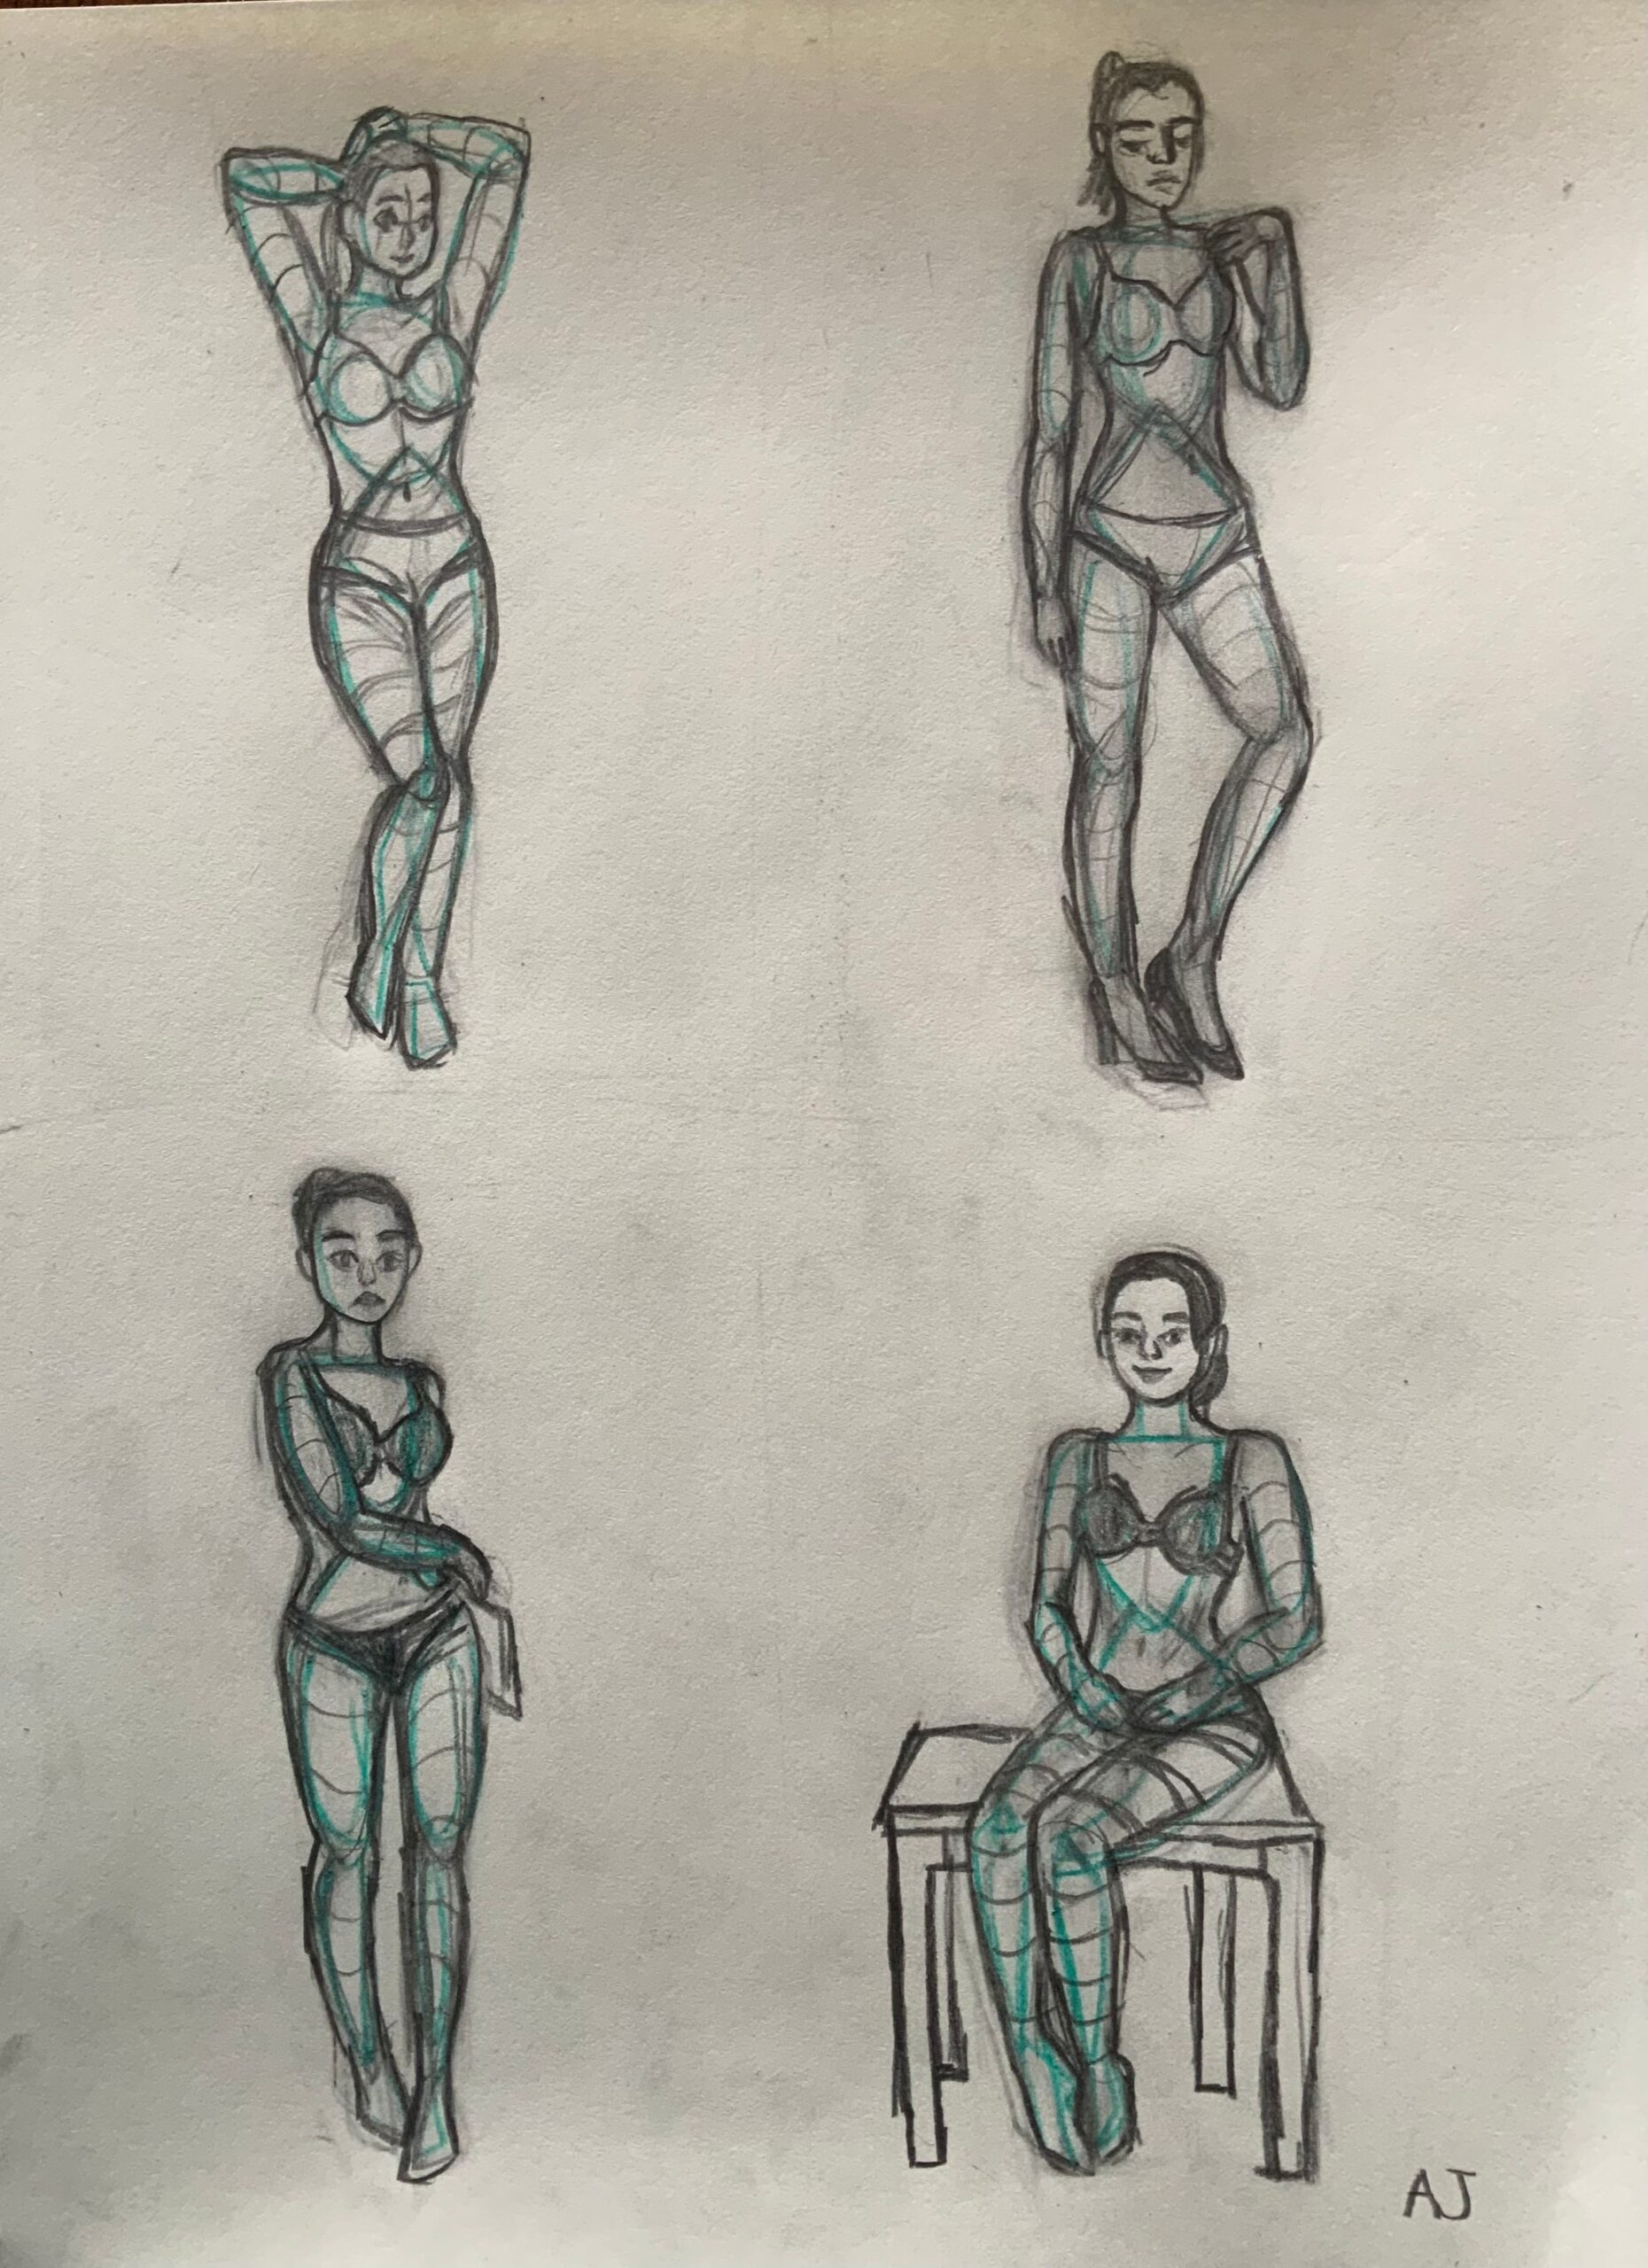
Every figure pose has a line of action, a single curved or diagonal line that captures the primary direction and energy of the pose. In simple figure drawing exercises, drawing this line first before any body parts gives you a directional anchor that keeps the figure from becoming static as you add structure and detail. The line of action typically runs through the spine, though in extreme poses it may continue through a limb to express the whole body’s directionality.
Structure in Figure Drawing Step by Step
The Ribcage and Pelvis as Primary Masses
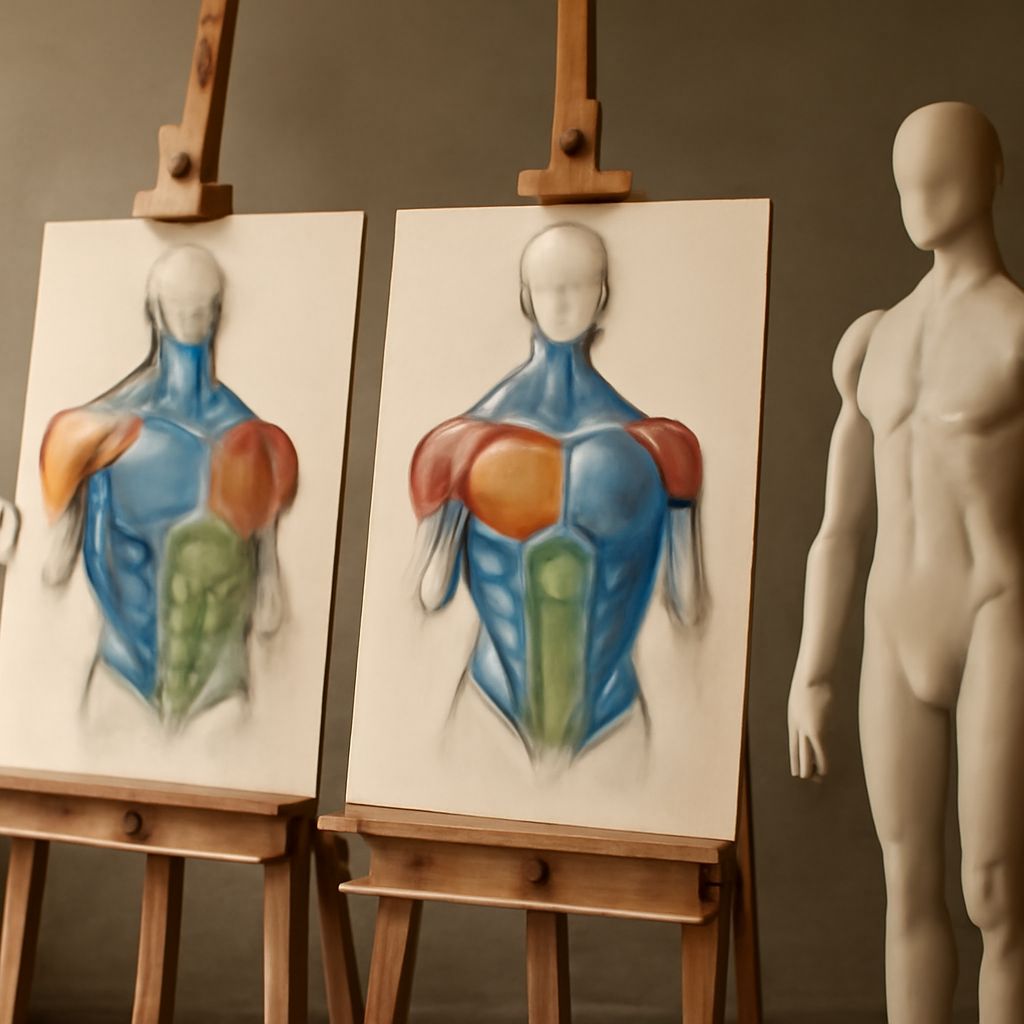
Drawing the figure structurally means starting with the two largest body masses: the ribcage (an egg shape, wider at the top and narrowing toward the bottom) and the pelvis (a bowl or butterfly shape, wider at the hips and narrowing at the waist). These two masses connect through the lumbar spine, which allows a degree of tilt and rotation between them. Getting the relative tilt of the ribcage and pelvis correct is the most important single step in figure drawing step by step because everything else, the legs, arms, head, and neck, attaches from these two anchors.
Adding Limbs to the Structure
Once the ribcage and pelvis are placed, limbs attach at the shoulder socket (on the sides of the upper ribcage) and hip socket (at the sides of the pelvis). In basic figure drawing, limbs are initially drawn as simple cylinders or tapered tubes without anatomical detail. This placeholder approach lets you check proportion and direction before committing to surface form. Drawing the figure in this modular way, placing major volumes first and refining within them later, is the approach used in professional character design and figure drawing at every level.
Simple Figure Drawing: Practical Exercises
Timed Gesture Studies
Timed gesture studies of one to five minutes force you to capture only the most essential information in drawing figures. Using an online gesture drawing tool or a reference book, draw a fresh pose for each time slot without correcting or refining. The goal is not accuracy but speed and expressiveness. After 20 to 30 gesture studies in a single session, your hand’s response to figure drawing input becomes noticeably more fluid.
Extended Structure Studies
Longer studies of 15 to 30 minutes allow figure drawing step by step structural development: gesture first, then primary masses, then secondary forms, then surface detail. Work from the largest decisions to the smallest, committing to each level before moving to the next. Extended studies reveal how well you understand each stage of drawing the figure because there is time to examine your decisions rather than reacting intuitively. Both quick and extended studies belong in a balanced figure drawing practice, addressing different skill components.