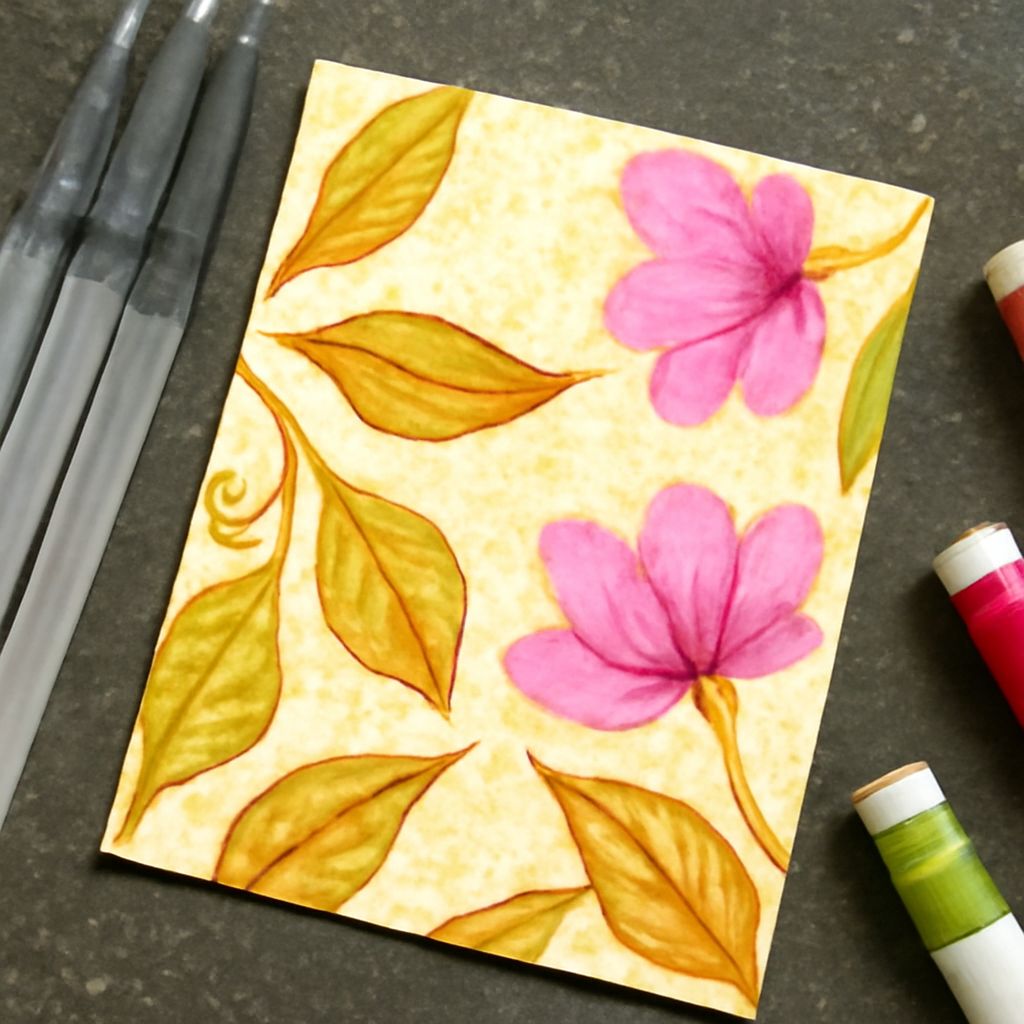
What is the first thing you need to know before opening a set of watercolors? That the medium rewards patience more than speed. Watercolor painting for beginners often starts with frustration because the instinct to control and correct the paint works against how the medium actually behaves. Watercolor for beginners requires a shift in mindset: you work with the paint’s natural tendency to spread, blend, and create soft edges rather than forcing it into the positions you want.
The good news is that basic watercolor techniques are genuinely accessible to anyone who takes time to understand them. Basic watercolor starts with a small number of fundamental moves: flat washes, graduated washes, wet-on-wet blending, and wet-on-dry control. Watercolor techniques for beginners are best learned in this order, from the most fundamental to the more nuanced, because each one builds on the previous. Once you understand what water does to pigment and what dry paper does differently than wet paper, the rest of the learning curve becomes much more manageable.
Essential Supplies for Watercolor Painting for Beginners
Paper Quality
Watercolor for beginners absolutely requires proper watercolor paper. Standard printer or sketchbook paper buckles badly when wet and makes it impossible to control washes. Use at least 140 lb (300 gsm) cold-press watercolor paper. Cold-press has a slight surface texture that holds paint well and allows for some reworking. Hot-press is smoother and better for fine detail but less beginner-friendly. Blocks (pads with glued edges) prevent buckling without tape or stretching.
Paint Selection Basic watercolor sets with 12 to 24 colors cover everything you need for early study. Student-grade paints are fine for practice. Artist-grade watercolors have higher pigment load and better lightfastness but cost significantly more. A basic watercolor palette should include a warm and cool version of each primary color: two yellows (lemon and cadmium or hansa), two reds (crimson and cadmium), and two blues (cerulean and ultramarine). From these six colors you can mix most of what you need.
Brushes
A round brush in sizes 6, 10, and 14 covers most watercolor techniques for beginners. Round brushes hold a belly of water and paint while tapering to a point suitable for detail. A flat wash brush helps with even coverage over large areas. Do not buy a huge set of brushes early; a few quality rounds serve better than many cheap alternatives.
Basic Watercolor Techniques
The Flat Wash A flat wash lays an even, uniform layer of color over an area without variation. Mix more paint than you think you need; running out mid-wash creates hard edges where you restart. Tilt your board at a slight angle (10 to 15 degrees) so that wet paint collects at the bottom edge of each stroke and gets picked up by the next stroke as you work downward. This is one of the foundational basic watercolor techniques because almost every painting starts with a flat wash in some area.
Graduated Wash
A graduated wash moves from a strong color at the top to a lighter or completely clear wash at the bottom, or vice versa. Start with full-strength paint in the first stroke, then add a small amount of clean water to your mix with each subsequent stroke. The wash lightens progressively. Watercolor painting for beginners benefits enormously from mastering this technique because it appears in skies, shadows, and virtually any area that requires tonal variation rather than a flat tone.
Wet-on-Wet
Wet-on-wet involves applying wet paint to a surface that is already wet with water or wet paint. The result is soft, diffused edges where the colors blend naturally. This is the most atmospheric watercolor technique for beginners because it produces effects that are impossible to achieve any other way. Wet your paper first with clean water, wait until it has a uniform sheen (not puddled), then drop in your colors. The paint spreads and blooms into beautiful organic shapes.
Wet-on-Dry Wet-on-dry applies wet paint to completely dry paper, producing hard, clean edges. This is what most people imagine when they think of watercolor for beginners: painting a specific shape with a defined outline. Wet-on-dry gives you control over edges and is essential for any area where you need precision. The combination of wet-on-wet for backgrounds and atmospheric areas and wet-on-dry for foreground details is the foundation of most watercolor paintings at any level.
Common Mistakes in Basic Watercolor
Overworking Wet Paint
The most common error in watercolor techniques for beginners is returning to an area while it is still wet. Disturbing wet watercolor creates blooms, streaks, and muddy colors. Lay a stroke, then leave it. If you need to adjust, wait until the area is completely dry before adding a new layer. This patience is the single most impactful habit change for anyone starting out in basic watercolor.
Using Too Little Water
Watercolor needs water to flow and blend. Paint applied with insufficient water sits stiff on the surface and resists blending into adjacent areas. Keep your brush generously loaded and your mixes fluid rather than thick. Watercolor painting for beginners feels more controlled with less water, but that control comes at the cost of the transparency and luminosity that makes the medium distinctive.