Drawing Human Body: A Practical Guide to Figure Drawing and Anatomy
What is the fastest way to improve at figure work? Start by understanding the structures that create the shapes you see. Drawing human body effectively requires two parallel skills: the ability to observe accurately and the ability to construct confidently from your structural knowledge when no reference is available. Both skills develop through deliberate practice, and both inform each other in ways that make progress compound over time.
Basic anatomy drawing gives you the framework. Drawing the human body from observation gives you the calibration. When you bring both together, drawing human figures becomes a problem of spatial reasoning rather than copying, which opens up your ability to pose figures in any position rather than only the ones you have drawn before. Drawing human form from imagination becomes achievable once you can construct the underlying structure without reference, and that construction skill starts with anatomy.
Proportional Systems for Drawing Human Body
The Eight-Head Figure
The most common proportional system for drawing human body divides the figure into eight equal head-heights. The chin sits at one head-height, the nipples at two, the navel at three, the hip at four, the mid-thigh at five, the knee at six, the mid-calf at seven, and the foot at eight. This system is idealized but gives you a consistent starting framework that prevents the most common proportion errors in figure drawing, particularly making the legs too short.
Key Landmarks
Regardless of the proportional system you use, certain skeletal landmarks always show through the surface form in basic anatomy drawing: the clavicles, the sternum notch, the iliac crests, the greater trochanters, the kneecaps, and the ankle bones. These bony points anchor your surface drawing to the underlying structure. Drawing human figures accurately depends on placing these landmarks correctly before filling in the muscular forms between them.
Adapting Proportions for Age and Type
The eight-head system represents an adult figure at the higher end of height. Shorter adults and children have proportionally larger heads relative to their bodies. A six-year-old child measures approximately six head-heights rather than eight. Drawing human form for different characters and ages requires adjusting the proportional system rather than simply scaling the same figure up or down.
Gesture and Structure in Figure Drawing
The Line of Action
Every pose has a primary line of action, a single curved or diagonal line that captures the overall thrust and energy of the figure. Finding this line first and drawing human body secondary details around it prevents the stiff, upright poses that plague beginner figure drawings. The line of action passes through the spine and often continues through one extended limb to create a unified flow through the whole figure.
Gesture Before Structure
In drawing human figures, gesture comes before anatomy. A quick gestural pass establishes where the weight is, which direction the body is moving or leaning, and how the limbs relate to the torso. This gestural foundation then gets replaced with structural construction: the ribcage box, the pelvis box, and the cylindrical limbs that hang from them. Basic anatomy drawing trained in isolation produces stiff figures; gesture trained without anatomy produces energetic but formless scribbles. Both must combine.
Basic Anatomy Drawing: Core Muscle Groups
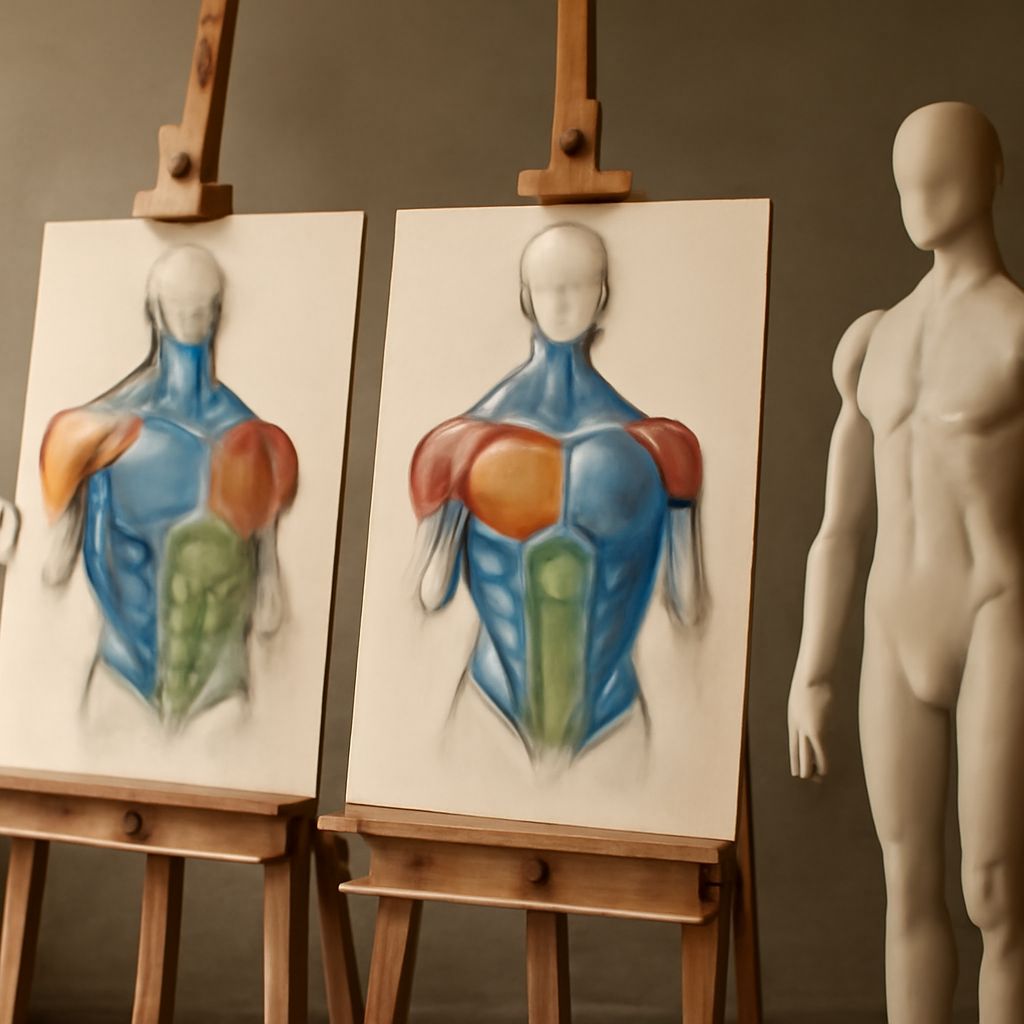
Torso Muscles
The torso’s surface form comes primarily from the pectorals (front), the latissimus dorsi (back and side), the serratus anterior (side of the ribcage), and the abdominal group (front). In drawing human form, these four muscle groups create most of the torso’s visible topography. Learning to simplify them into readable shapes without drawing every fiber of every muscle is the core challenge of torso anatomy for artists.
Arm Muscles
The arm has three major muscle groups at the upper arm: biceps, triceps, and brachialis. These three create the oval cross-section you see when looking at the arm from the end. The forearm contains a larger number of smaller muscles that rotate the wrist and control the fingers. For drawing human body, the forearm reads best when treated as a tapered cylinder that narrows toward the wrist, with only the largest surface muscles indicated.
Leg Muscles
The quadriceps group dominates the front of the thigh, creating a broad, rectangular mass that narrows into the knee. The hamstring group creates the back of the thigh with a softer, rounder form. The calf has two components visible from the back: the large gastrocnemius and the smaller soleus below it. Drawing human figures with convincing legs depends on understanding how these groups change shape as the knee bends and straightens.
Drawing Human Form from Different Views
Front View
The front view shows bilateral symmetry most clearly, which makes proportion errors easier to spot. In drawing human body from the front, the sternum runs down the center, dividing the pectorals evenly. The navel and pubic symphysis continue the central axis. Any lateral deviation in these landmarks indicates a tilt in the spine or pelvis and should be intentional in dynamic poses.
Three-Quarter View
The three-quarter view is the most commonly requested angle in figure drawing because it shows both the front and side of the body simultaneously, giving a more three-dimensional sense of form than either view alone. In drawing human figures from three-quarter, the overlap of near and far limbs creates foreshortening challenges. Learning to read these overlaps correctly is what separates competent three-quarter figure drawing from flat-looking work.
Back View
The back view of drawing human form reveals the trapezius, the erector spinae muscles flanking the spine, the rhomboids between the shoulder blades, and the gluteal muscles. The spine becomes a structural axis rather than a decorative detail from this angle. The triangular valley formed by the erector spinae and the posterior iliac crests is a characteristic landmark that makes a back view read immediately as a back view even in simplified drawings.
Practical Study Methods
Life Drawing Classes
Life drawing from a live model is the most direct way to develop drawing the human body skills. The model’s weight, breath, and small postural shifts create an ever-changing reference that trains observational speed and accuracy better than static photographs can. If in-person classes are not accessible, online life drawing platforms offer timed poses with photograph references that approximate the live experience.
Master Copy Study
Copying anatomical drawings by master artists such as Bridgman, Hogarth, or Loomis trains your hand to produce the specific forms associated with professional figure drawing. These copies are not ends in themselves but calibration exercises that help you understand how experienced artists simplify and structure the body. Combine master copy study with your own observation practice to avoid becoming a stylistic copy of your reference artists.