What is the most reliable method for creating a portrait sketch that actually looks like the person? Most artists make the same mistake: they try to draw the person rather than the shapes, values, and proportional relationships that define the face in the reference. Learning how to sketch a face from a photo successfully requires a shift in perception as much as a gain in technical skill. When you stop seeing “eye” and start seeing “a dark almond shape with a highlight at the upper left,” your face portrait drawing gets significantly more accurate.
This guide covers the perceptual and technical foundations of the portrait sketch, how to sketch a face from a photo using a structured approach, what distinguishes a sketch portrait from a fully rendered work, and how building a dedicated portraits drawings practice produces the fastest measurable improvement.
The Perceptual Foundation of a Strong Portrait Sketch
Seeing Shapes Instead of Symbols The biggest barrier to a convincing portrait sketch is symbolic thinking. Your brain has powerful symbols for facial features stored from childhood: the generic eye symbol, the generic nose symbol. When you draw from these symbols rather than from observation, your face portrait drawing looks like a cartoon approximation rather than a specific person. The fix is to look at your reference more than you look at your paper, and to describe what you actually see rather than what you expect to see.
When learning how to sketch a face from a photo, use the photograph as a collection of shapes, edges, and value transitions rather than as a face. Identify the darkest areas first. Note where edges are hard (high contrast transitions between forms) and where they are soft (gradual value changes). These observations, made before you pick up your pencil, produce dramatically better sketch portrait results than jumping straight into drawing features.
Value Structure Before Line
Strong portraits drawings begin with value structure rather than line. Establish the light side and shadow side of the face as two distinct tones before adding any detail. This large-scale value decision is the most important one in any portrait sketch because it communicates three-dimensional form at the primary read distance, before the viewer gets close enough to evaluate feature accuracy. A portrait sketch with correct value structure and slightly imprecise features reads as more convincing than one with accurate features and confused lighting.
How to Sketch a Face from a Photo Step by Step
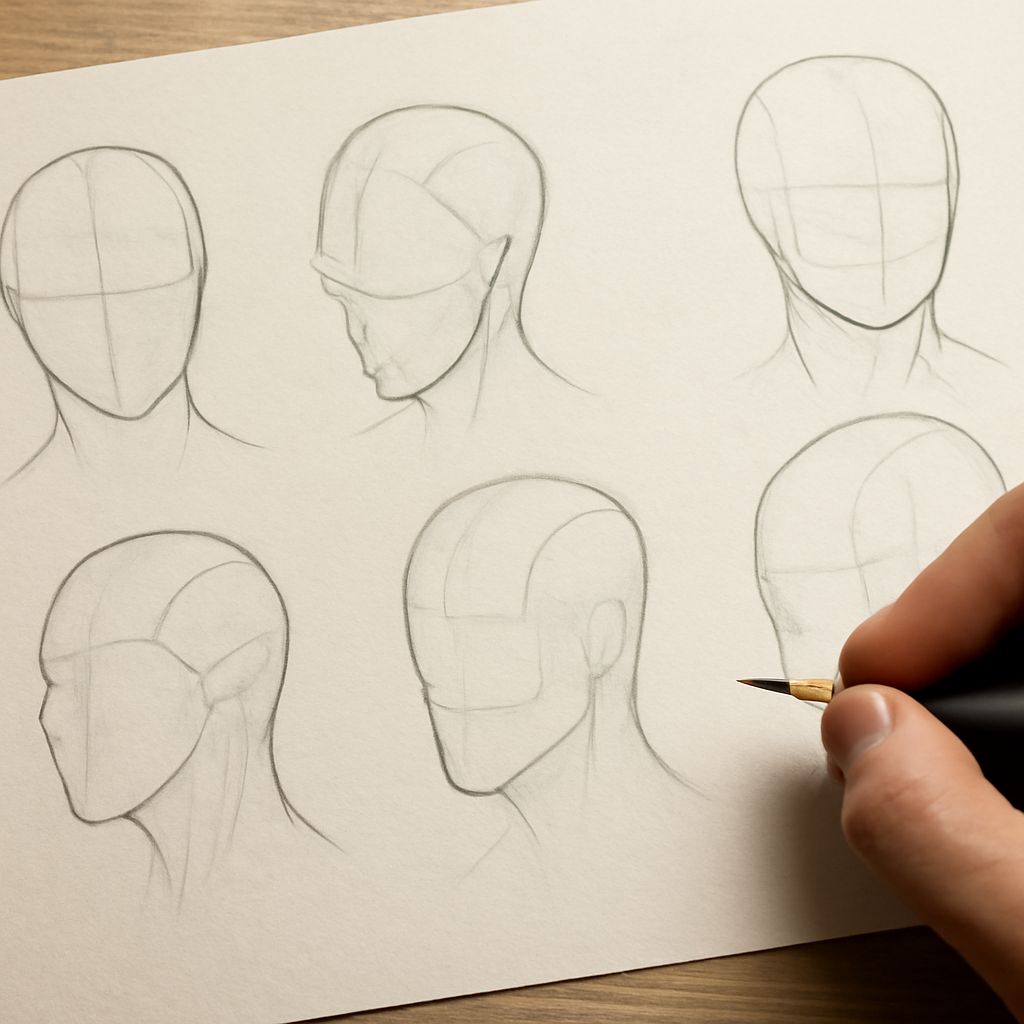
Starting with Block-In Begin every face portrait drawing with a light block-in that establishes the overall head shape, the placement of the eye line (at the halfway point of the head height), and the major proportional divisions. Use the photograph as a measurement reference: the face is roughly five eye-widths across at the eye line, and the bottom of the nose sits halfway between the eye line and the chin. Check these proportions before adding any detail.
For how to sketch a face from a photo at a more advanced level, use a grid lightly drawn over the photograph to transfer proportional relationships more accurately. This is not a shortcut around learning to see, it’s a training tool that teaches your eye to make the same comparisons unaided over time.
Feature Placement and Adjustment
Place features lightly and check them against each other before committing with darker marks. The most common error in a sketch portrait is placing one feature accurately and then drawing subsequent features from memory rather than continuing to check against the reference. Each feature’s position should be verified against at least two other placed landmarks before you develop it further.
Building a Portraits Drawings Practice
Consistent portraits drawings practice produces faster improvement than occasional ambitious portrait projects. Short, frequent sessions of twenty to thirty minutes, focused on a single aspect of the portrait, build perceptual skills more reliably than long, infrequent sessions that try to address everything at once. Spend one week focused exclusively on value structure. The next week, focus on edge quality. The week after, focus on proportion checking techniques.
Keep all of your portrait sketch work in a single sketchbook so you can track improvement over time. Return to the same reference photograph every month to measure your growth against a fixed standard. The gap between your first attempt and your most recent one is the clearest indicator of how your how to sketch a face from a photo skills are developing.
Key takeaways: A successful portrait sketch depends on seeing shapes and values rather than symbolic features. Building a sketch portrait from large value masses before adding detail produces more convincing results. Consistent portraits drawings practice, focused on one skill at a time, produces faster and more measurable improvement than sporadic full-portrait attempts.