Sunflower Drawing: Step-by-Step Guide to Sketching Bold Blooms
What makes a sunflower so satisfying to draw? The answer lies in the combination of a structured center and freely radiating petals. A sunflower drawing rewards you for paying attention to geometry while still allowing expressive, loose linework. Whether you are picking up a pencil for the first time or looking to push your sunflowers drawing further, this guide walks you through every stage from first circle to finished sketch.
Before you start, it helps to look at a real sunflower or a clear reference photo. The more you understand the form, the more confident your sunflower sketch will look. A drawing of sunflower from direct observation almost always turns out stronger than one drawn from memory. Drawing sunflowers well is really a matter of slowing down and breaking the plant into simple parts.
Supplies You Need Before You Start
Pencils and Paper
You do not need anything fancy. A set of graphite pencils ranging from H (light) to B (dark) gives you good control over line weight and shading. For paper, a smooth drawing pad or sketchbook with at least 80 lb weight prevents tearing when you erase. Heavier paper also accepts ink or watercolor if you want to add those later.
Optional: Inking Tools
A fine-tip ink pen or brush pen lets you add bold, clean outlines after your pencil sketch is complete. This is not required, but it makes the final piece more graphic and defined, especially if you plan to scan or digitize your sunflower sketch.
Understanding Sunflower Structure
The Seed Head
The center of a sunflower is a dense, spiral-packed cluster of florets that eventually become seeds. This circular disk accounts for a large proportion of the flower’s total diameter and has a roughly convex shape when mature. Understanding this dome-like form helps you shade it correctly.
Petal Shape and Arrangement
Sunflower petals are called ray florets. They radiate outward from the seed head in a single layer, each one oblong with a slightly pointed tip. They are not perfectly uniform, which is exactly what gives a finished sunflower drawing its natural quality. Draw them at slightly varied angles and lengths.
Stem and Leaves
The stem is thick and slightly rough, tapering toward the top where it meets the flower head. Leaves are large, coarse-edged, and heart-shaped, attaching at regular intervals along the stem. Including at least one partial leaf adds visual grounding to a drawing of sunflower.
Step-by-Step Sunflower Drawing Process
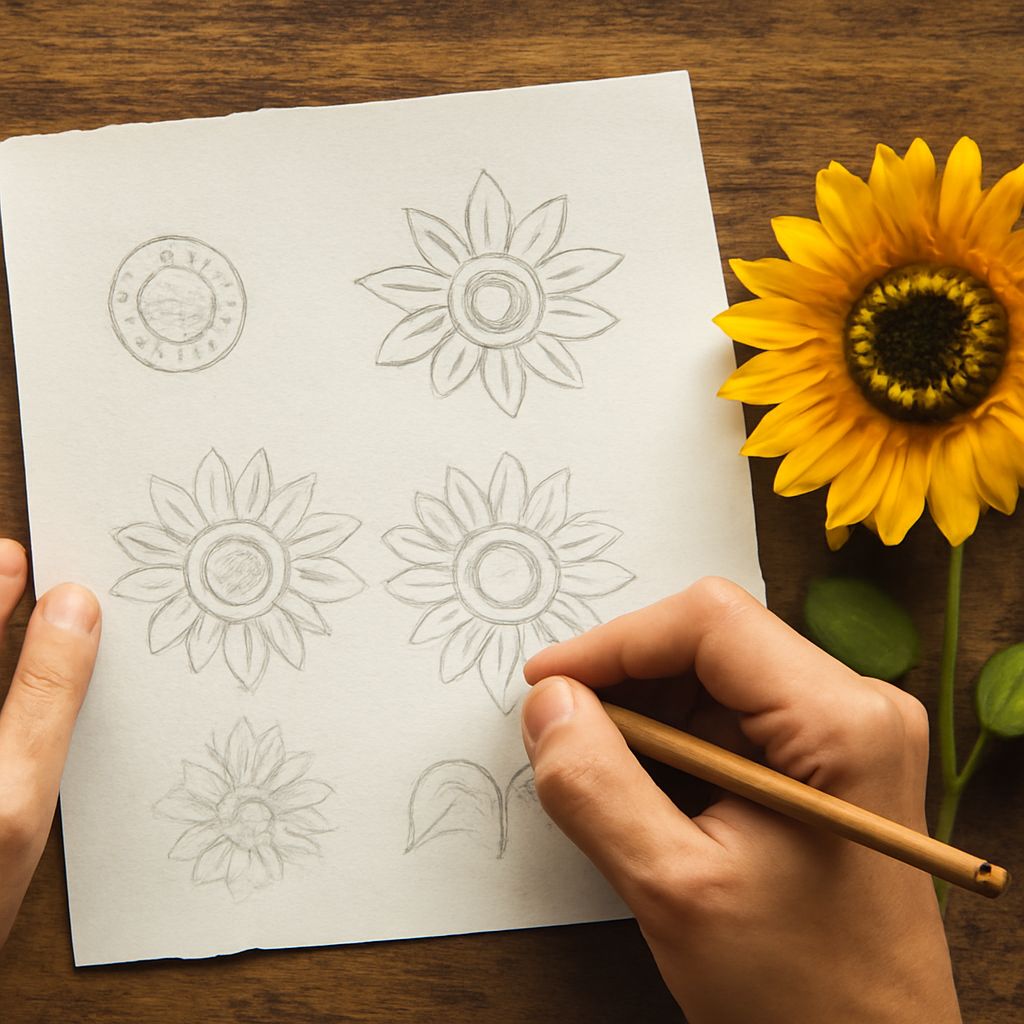
Sketching the Basic Circle
Start with a light circle for the seed head. This does not need to be perfect. Its size relative to your page sets the scale for everything else. Most beginners draw the center too small, which crowds the petals.
Adding Petals Layer by Layer
Draw the back row of petals first as partial ovals behind the circle. Then add the front row of petals directly attached to the center ring. This layering is key for a believable sunflowers drawing because it creates visual depth. Front petals overlap and partially obscure the back ones.
Detailing the Center
Once your petals are placed, add the spiral grid pattern in the seed head using curved lines crossing in two directions. You do not need to draw every seed. A suggestion of the pattern reads clearly from a distance and looks far more natural than an overly precise rendition.
Finishing the Stem and Leaves
Drop a slightly curved stem down from the base of the flower head. Add one or two leaves using simple shapes first, then refine the edges. Drawing sunflowers with visible leaf detail makes the plant feel complete rather than floating.
Refining Your Sunflower Sketch
Shading Techniques
Decide on a single light source. Shade the petals on the shadow side with light parallel hatching. The seed head gets a gradient from light at the top center to darker at the outer edges where it curves away from the viewer. Keep your shading strokes following the form rather than going in random directions.
Adding Texture to the Seed Head
A few short marks in the darkest areas of the seed head suggest texture without overworking the surface. Sunflowers have a slightly rough, bumpy center, so small stippling or cross-hatching in specific areas adds realism.
Common Mistakes and How to Fix Them
Petals Too Uniform
If every petal looks identical, the drawing reads as stiff and artificial. Fix this by drawing some petals slightly shorter, slightly wider, or at a more pronounced angle. Reference photos help you see how much natural variation exists.
Center Looks Flat
A flat-looking seed head usually means the shading was applied evenly with no gradient. Add darker values near the bottom and edges of the circle to suggest the dome shape. This single change makes the sunflower sketch look three-dimensional immediately.