Face Structure Drawing: Practice Methods for Facial Structure and Features
What separates effective face structure drawing practice from the kind of drawing practice that doesn’t produce measurable improvement? The difference is almost always the specificity of what you’re working on. Wandering through general face drawing practice without targeting specific weaknesses produces more drawings without producing more skill. Face drawing practice becomes transformative when you isolate one aspect of facial structure drawing at a time and give it your undivided technical attention.
This guide covers how to approach face structure drawing systematically, what the most productive facial structure drawing exercises look like, how to integrate facial features drawing into a structured practice rather than treating features as separate from the overall face structure, and how drawing faces practice builds cumulative skill when organized around clear short-term goals.
Understanding Face Structure Before Drawing Features
The Underlying Geometry
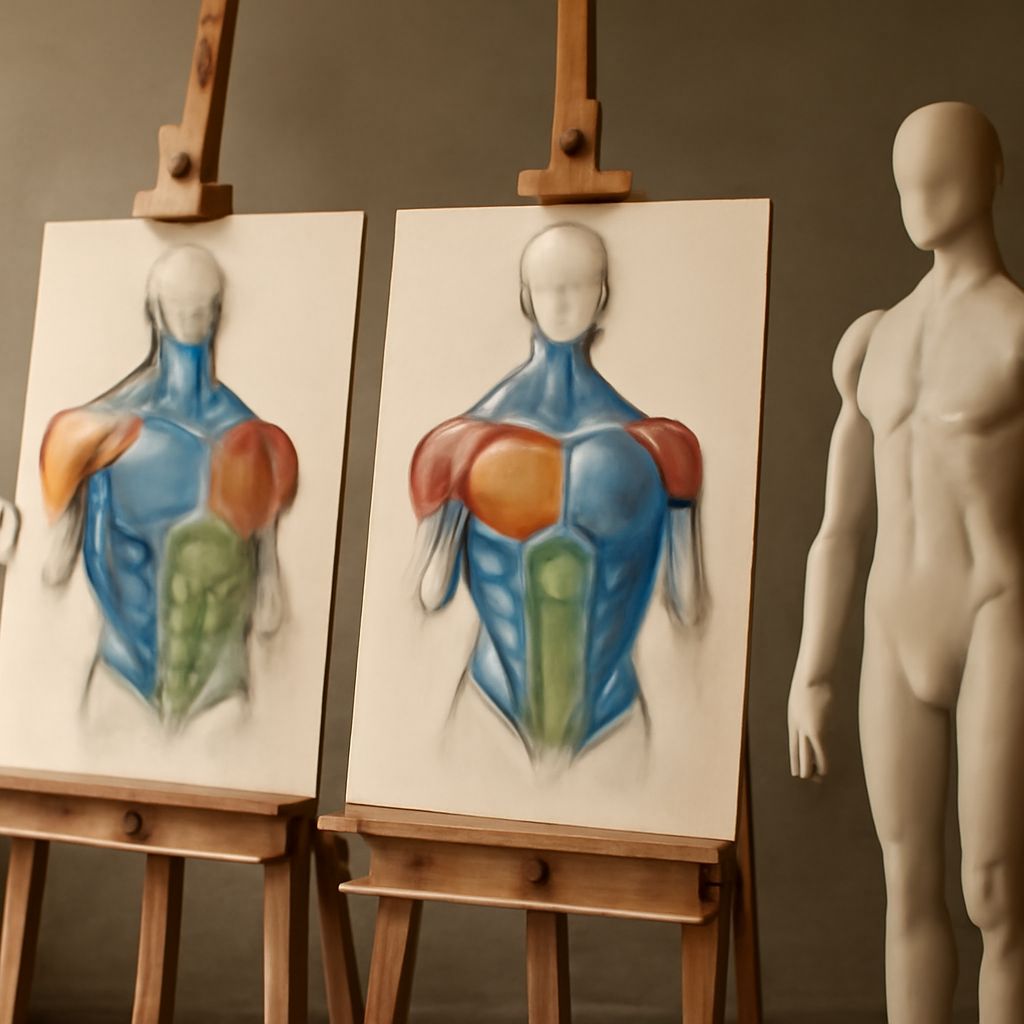
Face structure drawing begins with the underlying geometry of the skull. The cranium is a sphere-derived form, wider and taller than most beginners expect relative to the face. The face itself occupies the lower portion of this overall head form, from the brow ridge to the chin. When you understand facial structure drawing as placing a face on a head volume rather than drawing a face in isolation, your proportions immediately become more accurate.
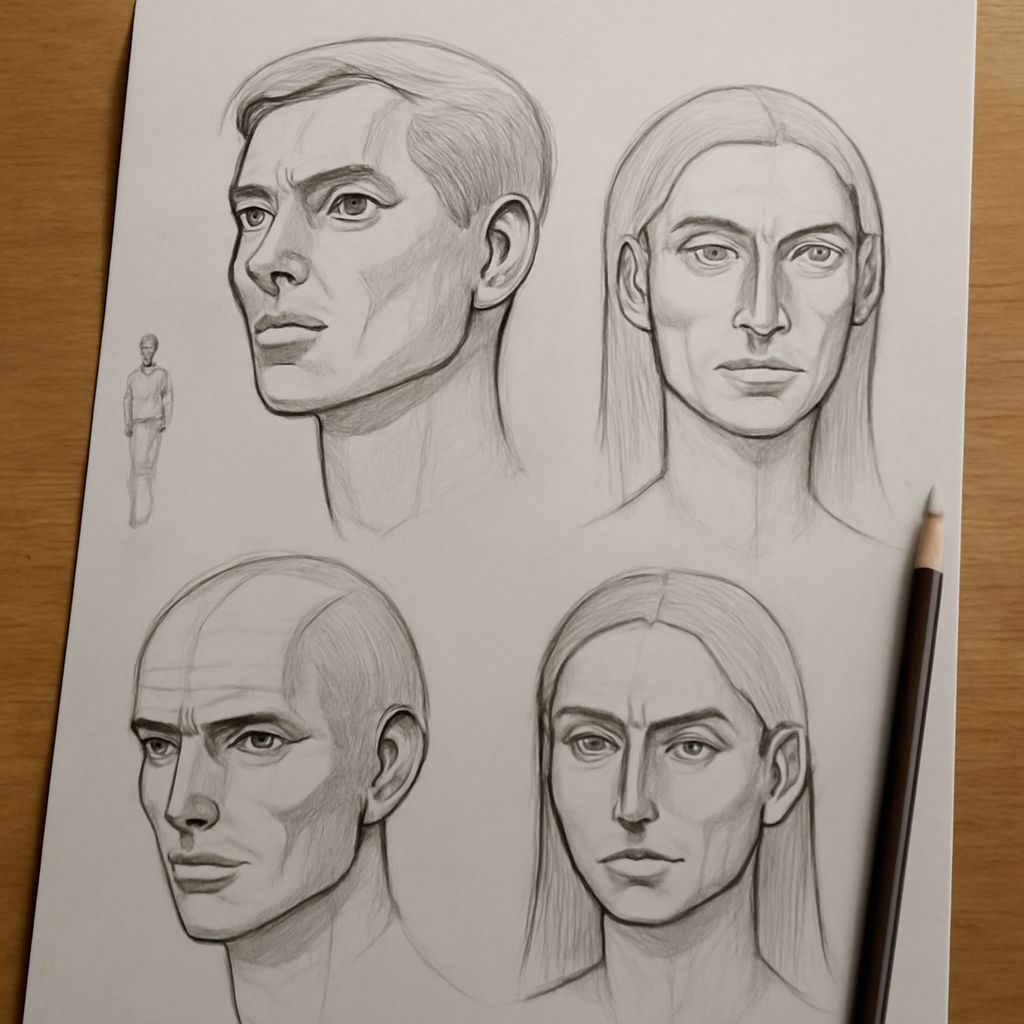
The most useful construction approach places the head as an egg or compressed sphere, then divides it into equal horizontal halves. The eyes sit on this halfway line. Below the eye line, divide the remaining space into equal thirds: the nose base at the first line, the lower lip base at the second line, the chin at the bottom. This grid gives you a reliable spatial framework before you commit to any feature placement.
Skull Landmarks and Proportion
Face structure drawing benefits significantly from knowing the skeletal landmarks that drive the surface forms you see. The brow ridges create the horizontal overhang above the eyes. The zygomatic arch (cheekbone) creates the widest point of the face and the shadow plane along the lateral face. The mandible angle defines the jawline profile. Knowing where these landmarks are and how they shift with face angle lets you construct facial structure drawing from any viewpoint rather than only the front view where you can use the proportion grid directly.
Facial Structure Drawing Exercises That Work
The Loomis Method
Facial structure drawing practice benefits enormously from the Loomis method, a construction approach that places the head as a sphere, slices off two vertical planes to create the temporal regions, and attaches a simplified face plane to the front of the sphere. Working through this construction in multiple head positions, from front, three-quarter, and profile, builds the spatial understanding of the head that makes face drawing practice in observation sessions much more accurate.
Spend fifteen minutes per day for one month on Loomis-method facial structure drawing before attempting to develop features with any precision. This foundation work produces faster overall improvement than spending the same time on feature-focused facial features drawing that lacks a solid structural base.
Isolating Individual Features
Once your face structure drawing foundation is solid, practice facial features drawing in isolation before placing features on full head constructions. Draw eyes alone in multiple positions and lighting conditions. Draw noses from front, three-quarter, and profile. Draw mouths at different emotional expressions. These isolated facial features drawing exercises build the specific observational knowledge you need to draw each feature convincingly across varying conditions.
Drawing Faces Practice: Building a System
Drawing faces practice works best when organized into deliberate cycles rather than approached randomly. A productive cycle might look like this: spend one week on facial structure drawing without features, focused entirely on getting the head form and mass placement correct. Spend the next week on isolated facial features drawing for each individual feature in sequence. Spend the third week combining what you’ve practiced into complete faces from reference. Spend the fourth week drawing faces from imagination, applying everything you’ve built.
This cycling approach to face drawing practice prevents the common mistake of trying to do everything at once. When you cycle deliberately through face structure drawing and then feature work, each phase supports the next rather than competing with it for your attention.
Track your drawing faces practice by keeping dated studies in a single sketchbook. Return to the same reference every four weeks and compare your recent attempt against your first attempt from the same source. Visible improvement in facial structure drawing and feature accuracy is one of the most motivating aspects of consistent practice, and documentation makes that progress legible in a way that memory alone cannot.