Magnolia Drawing Guide: How to Sketch Magnolia Flowers Step by Step
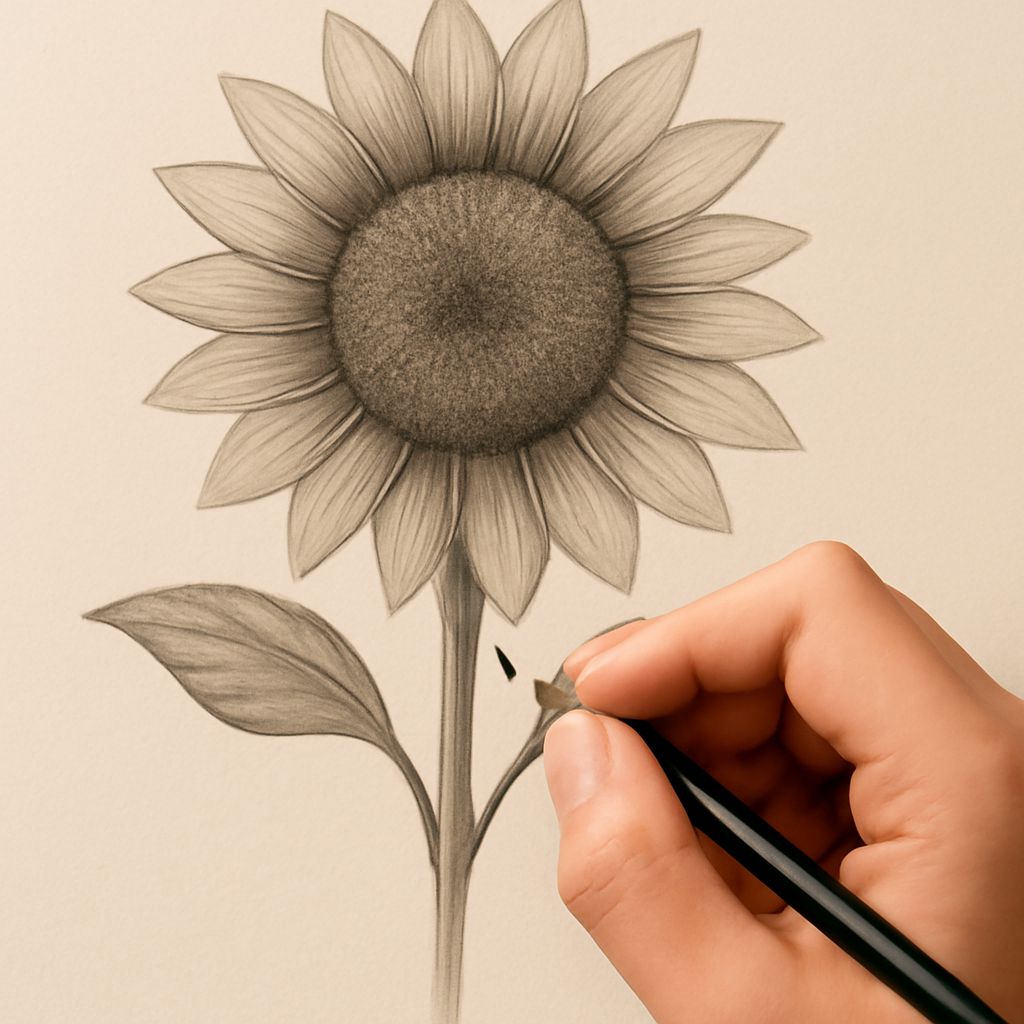
Have you ever tried a magnolia drawing and found yourself unsure where to start? These large, waxy blooms look complicated at first glance, yet they break down into simple curved shapes once you understand their structure. Whether you want to do a magnolia flower drawing for a greeting card, a sketchbook study, or a full botanical illustration, the same core steps apply.
This guide walks you through the process from basic shapes to finished detail. You’ll also find practical drawing guidelines for setting up your workspace and managing proportions, plus ideas for drawing a river backdrop or a drawing club project where members tackle botanical subjects together.
Understanding the Magnolia Flower Before You Draw
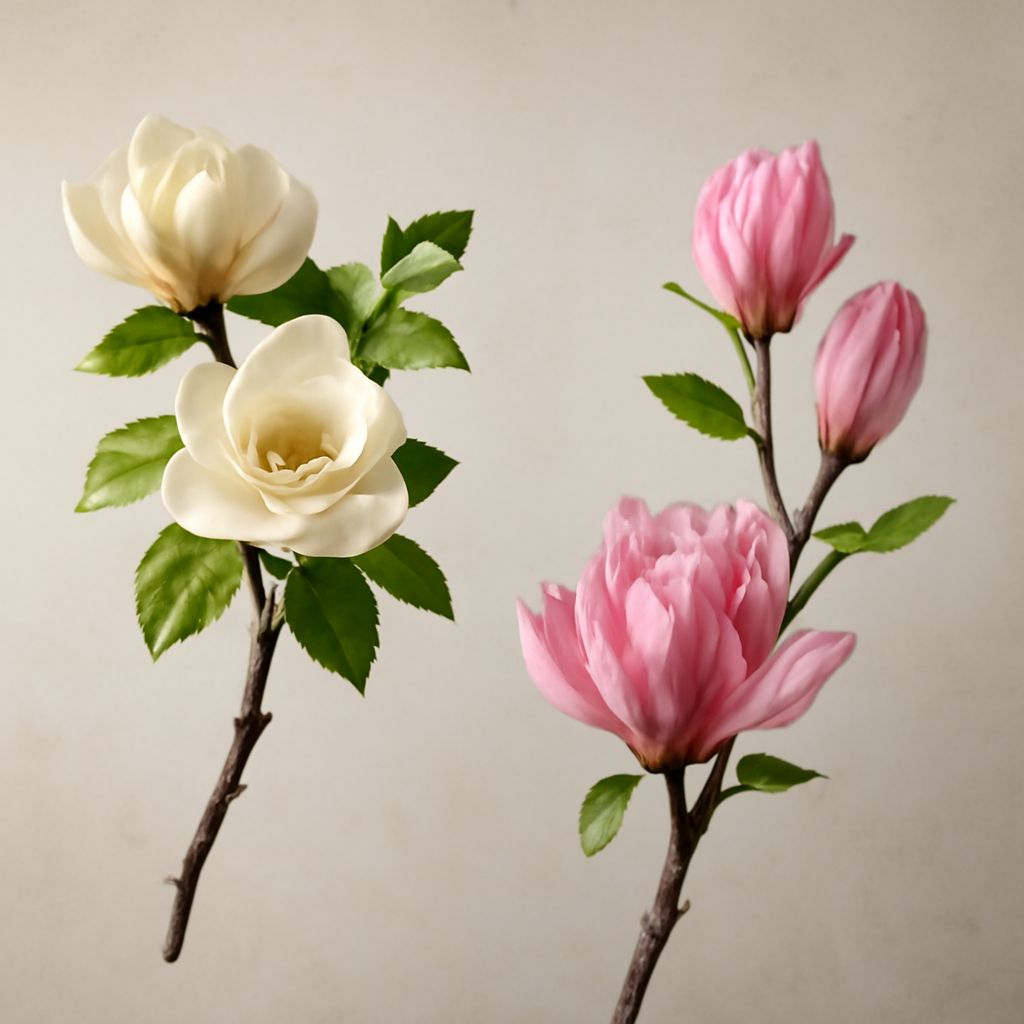
Magnolias belong to one of the oldest flowering plant families on Earth. Their petals, technically called tepals, are thick and overlap in a loose cup shape. Most species have between six and twelve tepals arranged in two or three rings. The central cone holds the stamens and pistils and is one of the most distinctive features to capture in any magnolia drawing.
Study a real bloom or a clear reference photo before you pick up a pencil. Notice how the tepals curve outward at the tips and how the underside is slightly different in tone from the upper surface. That tonal difference is what gives depth to a magnolia flower drawing.
Setting Up Your Drawing Guidelines
Basic Construction Lines
Start every botanical sketch with light construction lines. Draw a vertical axis and a horizontal axis crossing at the center of where the flower will sit. These drawing guidelines help you keep symmetry without ruling everything out and leaving no room for natural variation.
Next, lightly sketch an oval or circle for the overall flower head. Mark the position of the central cone with a small ellipse inside the oval. From that ellipse, draw gentle arcs radiating outward to indicate where each major tepal will fall.
Proportion and Scale
Magnolia flowers are big relative to the branch they grow on. If you include a branch or stem in your composition, keep the flower at least two to three times the diameter of the stem. That proportion feels botanically accurate and prevents the drawing from looking top-heavy in an unnatural way.
Drawing the Tepals Layer by Layer
The Outer Ring First
Begin with the outermost tepals. These are the ones that have opened fully and often curve backward slightly. Draw each one as a broad, tapered shape with a slightly cupped curve along its length. The edges should be smooth, not jagged. Magnolia petals have almost no serration.
Leave a small gap between adjacent tepals at the base so the central cone area reads clearly. That gap also suggests the three-dimensional form of the flower.
Inner Tepals
The inner ring of tepals stands more upright and overlaps the outer ring at the base. Draw these as narrower, taller shapes. The tips of inner tepals often touch or nearly touch above the cone, giving the bloom a slightly closed look even when it is fully open.
Pay attention to overlapping. When one tepal passes in front of another, the one behind loses its outline where it is hidden. Breaking that line creates depth far more effectively than shading alone.
Rendering the Central Cone
The cone is a cylinder of tightly packed stamens and pistils. Sketch it as a narrow oval sitting on a short stem. Add small tick marks or dots over its surface to suggest the packed texture without trying to draw every individual stamen.
In a detailed magnolia flower drawing, you can add more texture to the cone by varying the length of your tick marks and grouping them in slightly curving rows. Keep the marks loose; a stiff, mechanical texture looks less natural than a varied one.
Adding Leaves and a Branch
Magnolia Leaves
Magnolia leaves are large, leathery, and elliptical with a prominent midrib. Draw the midrib first as a slightly curved line, then build the leaf shape around it. Add secondary veins branching off at shallow angles. The surface should look smooth and glossy, which you can suggest by leaving highlight areas free of shading.
Branch Structure
Branches grow at angles, not straight up. A gentle curve in the branch makes the drawing feel alive. If you want to practice drawing a river scene later, the same principle applies: flowing curves read more naturally than rigid lines.
Shading Techniques for Magnolia Drawings
Magnolia tepals have a waxy surface that reflects light sharply. Use a hard pencil like an H or 2H to build up light hatching across the shadow areas. Keep your highlight zones completely clean. The contrast between the white highlight and the soft shadow is what makes a magnolia drawing look convincing.
For the underside of tepals, shade slightly darker than the upper surface. A hint of reflected light along the lower edge of each tepal adds a subtle three-dimensional quality that lifts the whole illustration.
Using Magnolia Drawings in a Drawing Club Setting
Botanical subjects work well for a drawing club because members at different skill levels can all find a way in. Beginners can focus on the overall silhouette and simple shading, while more experienced artists work on accurate tepal structure and tonal rendering. Sharing reference photos and comparing approaches is a good way to learn from each other.
Set a time limit if your drawing club works in sessions. Thirty to forty-five minutes is enough for a solid magnolia flower drawing study. Timed sessions reduce overthinking and build confidence in your mark-making.
Practicing with Different Media
Pencil is the easiest starting point, but magnolia drawings translate well to other media. Pen and ink with crosshatching captures the tonal contrast nicely. Watercolor can suggest the translucent quality of the petals, though you need to plan your light areas before you apply any wash. Colored pencil lets you build up subtle layers of cream, pink, and green to match the actual bloom colors.
Whatever medium you choose, start with the same drawing guidelines and construction approach. The underlying structure is the same whether you finish in graphite or watercolor.